Showing posts with label Crafts. Show all posts

Sunday, February 12, 2012

Crayon Cups....by (Angela) Jean

We are on a bit of a crayon-melting streak around here.

I've been storing all our broken crayons in a jar in my craft cupboard for a while now, and since we ended up with an abbreviated Field Trip Friday, we had some time on our hands on Friday afternoon. Time to get melty!

We peeled off all the labels and sorted them all by colour. (The colour sorting is purely optional, of course)
We filled our silcone baking cups.


I put them in the oven for 15 minutes at 225 degrees F.
We let them cool for a few minutes, and then popped them out.
The original plan was to use them for colouring, but so far, they have mostly been used for making towers, playing 'pretend cupcake shop', and picnic food for the stuffies.

Tuesday, February 07, 2012

Manic Monday Melts.....by (Angela Jean)

Not everyone looks forward to Mondays, but we sure do.

Monday is the day when the Rascals and I have a standing play & lunch date with my friend Sarah and her daughter Madeleine. Sarah and I have been friends since we met in Grade 5, back in our hometown. We even lived together for a few years when we first moved to Toronto. Sarah and I had a lot of fun in that apartment on Winnett. I clearly remember sitting across the kitchen table from her one day, venting my frustration about the crumby guys I had been dating. I told her that I was done with stupid boys. I believe my exact words were "Why can't there be more guys like Shawn? (my good friend at the time, who was dating someone else) My next boyfriend will be exactly like him. If I meet a guy and he is not as great as Shawn, I won't date him!" (And as you've probably figured out, Shawn and I have now been married for going on 10 years). Sarah was one of the readers at our wedding. I was a bridesmaid at hers. Now, years later, and with 5 children between us, we live just around the corner from each other. Serendipitously, we are both at home full-time now, and we get to spend time together, weekly. Sometimes I shake my head at how things work out....I am so lucky....

This week's play date was at Sarah's house, and she had a craft planned for us. Since it's so close, and Shawn takes our car to work, we walk. When we arrived, and I saw how pretty the craft area looked I borrowed Sarah's van and quickly drove to our house to get my camera.

Sarah had grated some crayons with a rasp, until they were in little piles of colourful goodness.
The kids each had a rectangle of waxed paper, and dropped bits of the colourful crayon-shavings onto them. They used their fingers to create their designs.


Another piece of waxed paper was placed over top, and then newspaper on top of that. Sarah ironed the stacks, one at a time, with a warm iron (not hot!).


The final results were beautiful, especially when hung on a window, so the light could shine through.


I had to include this one because of its alarming resemblance to the MRI image I once saw of my own uterus. Perhaps Amelia was drawing it from memory?

Wednesday, December 21, 2011

Salt Dough Ornaments...by (Angela) Jean

We have been enjoying preparing for Christmas and have been in full-on craft mode for several weeks now.

The kids and I have been doing all kinds of paper crafts together, but I was searching for something that we could make together, that was simple enough that they could fully participate, but that was sturdy enough to last. When my friend Jaye mentioned she was making salt dough ornaments with her son, I thought that would be perfect!

I did a little search on Pinterest (do you know about Pinterest? Oh man....check it out!) and found countless ideas. My main inspiration came from this post on Salt Dough Handprint Ornaments, on Homemade Grits' blog. I thought these would be a great way to remember Christmas 2011.
For the dough, I used the same recipe as Homemade Grits: very, very simple.

4 cups flour
1 cup salt
1 1/2 cups water

(As an aside this dough is great for kids because unlike cookie dough, there is no butter or sugar so it's not greasy or sticky! So easy to clean up!)

Combine ingredients and kneed for 15-20 minutes until dough becomes smooth and elastic.


Roll out on a lightly floured surface and cut out shapes with cookie cutters.
some of the dough we left smooth and some we textured with the meat tenderizer


Bake in a 300 F oven for 2-4 hours or until they are good and hard. When I was doing my research, I found several suggestions for temperatures and baking times. One even suggested leaving the ornaments in a 200 degree F oven over night. My ornaments were relatively small and thin so 3 hours or so was plenty.

Unfortunately, our hand print ornaments didn't turn out. They puffed up like a big bubble in the oven and then crumpled as they cooled. I think I should have pricked them with a pin to avoid any air bubbles. I plan to try them again.

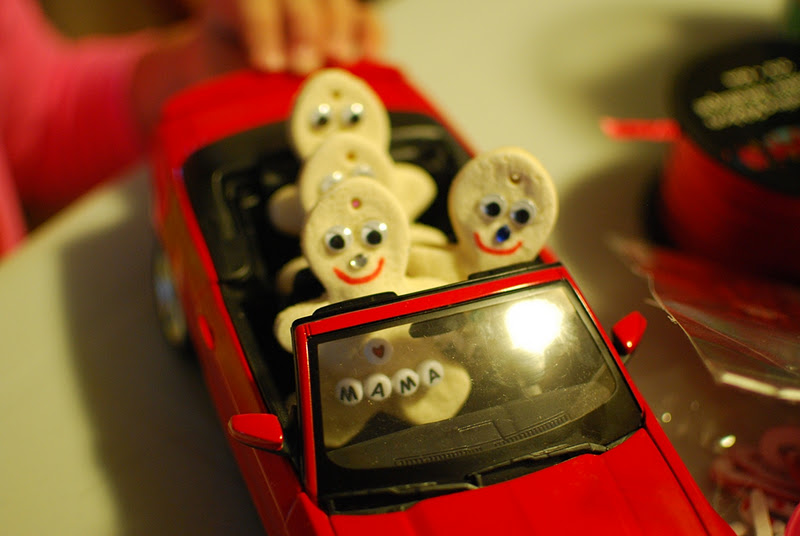
The other shapes worked out quite well. Some we left plain and glued on beads and jewels. These ones have the names of our next-door neighbours, who tend to end up as the guinea pig testers for all our crafting and baking projects...they haven't complained yet!


Mimi was concerned that they looked too much like real cookies so she made a card to tell the neighbours not to eat them.

Others we painted with glitter paint.
This Martha Stewart glitter paint comes in amazing colours, but like all glitter paint you need to do several coats to get solid coverage. I think I did about 6 coats.
This was coat #1

We made a few in the shape of gingerbread people, but I thought the googlie eyes made them look a little creepy, so I let the kids play with them until they broke. (They lasted about 30 minutes before being decapitated in automobile accidents....it was gruesome....and quite un-Christmassy)

I got so into this project that I made a second batch, and based on suggestions from other internet crafters, I added some cinnamon to the dough just to make it smell a bit nicer. In the end though, it was pointless because I ended up spraying them with Mod Podge varnish to preserve them. I sprayed them outside to avoid stinking up the house and when it dried the varnish had no smell at all.


We enjoyed our salt dough experiment and are very happy with the results. We ended up with about 3 dozen ornaments. Some we will keep and the rest will be given to friends and family as little gifts.

Sunday, December 04, 2011

Gingerbread Mania....by (Angela) Jean

Nothing says 'festive' like 11 small children hopped up on candy.

I love Christmas crafts and now that I have children of my own I can throw crafty parties and people will be fooled into thinking I'm doing it 'for the kids' when really, the fun is all mine. Well, that may be a bit of an exaggeration...I think the kids (and I'm going out on a limb to say the adults too) have a bit of fun.

Preparation is key when doing these kind of events for kids. In general, little people are not known for their patience and they really can't hear "we're almost ready" more than a couple of times before they revolt. I also took it easy on myself and purchased the gingerbread houses. I'm sure they will not be as tasty as homebaked, but to be honest: a) this was more of a craft project than a baking project and b) does anyone really want to eat anything that small kids have had their paws all over? My friend Sarah baked the sugar cookies. They were delicious!


I tried my best to do most of the prep work the night before. I rolled up the rugs, set up the folding tables, assembled the gingerbread houses and arranged the paper craft stations.


There were three activities planned: gingerbread house decorating,


paper crafts,


and Christmas cookie decorating.
Mmmmmm.....doesn't that look delicious?


I was impressed with the level of focus the kids mustered up. At times, the house was almost silent. You would have never guessed that there were 6 boys and 5 girls all under 10 in my teeny house!


 All in all, the party was a success, and I look forward to making it an annual tradition.