
The kids and I have been doing all kinds of paper crafts together, but I was searching for something that we could make together, that was simple enough that they could fully participate, but that was sturdy enough to last. When my friend Jaye mentioned she was making salt dough ornaments with her son, I thought that would be perfect!
I did a little search on Pinterest (do you know about Pinterest? Oh man....check it out!) and found countless ideas. My main inspiration came from this post on Salt Dough Handprint Ornaments, on Homemade Grits' blog. I thought these would be a great way to remember Christmas 2011.

4 cups flour
1 cup salt
1 1/2 cups water
(As an aside this dough is great for kids because unlike cookie dough, there is no butter or sugar so it's not greasy or sticky! So easy to clean up!)
Combine ingredients and kneed for 15-20 minutes until dough becomes smooth and elastic.


Roll out on a lightly floured surface and cut out shapes with cookie cutters.

 |
| some of the dough we left smooth and some we textured with the meat tenderizer |

Bake in a 300 F oven for 2-4 hours or until they are good and hard. When I was doing my research, I found several suggestions for temperatures and baking times. One even suggested leaving the ornaments in a 200 degree F oven over night. My ornaments were relatively small and thin so 3 hours or so was plenty.
Unfortunately, our hand print ornaments didn't turn out. They puffed up like a big bubble in the oven and then crumpled as they cooled. I think I should have pricked them with a pin to avoid any air bubbles. I plan to try them again.
The other shapes worked out quite well. Some we left plain and glued on beads and jewels. These ones have the names of our next-door neighbours, who tend to end up as the guinea pig testers for all our crafting and baking projects...they haven't complained yet!


 |
| Mimi was concerned that they looked too much like real cookies so she made a card to tell the neighbours not to eat them. |
Others we painted with glitter paint.
 |
| This Martha Stewart glitter paint comes in amazing colours, but like all glitter paint you need to do several coats to get solid coverage. I think I did about 6 coats. |
 |
| This was coat #1 |
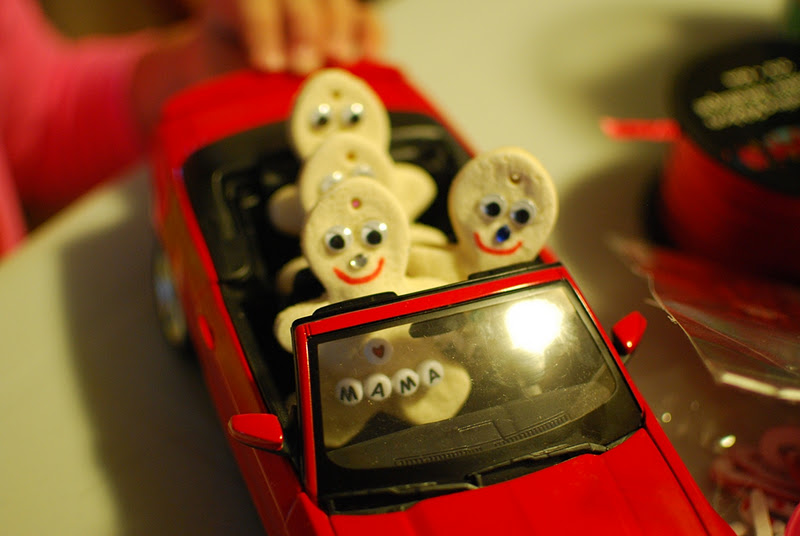
We made a few in the shape of gingerbread people, but I thought the googlie eyes made them look a little creepy, so I let the kids play with them until they broke. (They lasted about 30 minutes before being decapitated in automobile accidents....it was gruesome....and quite un-Christmassy)
I got so into this project that I made a second batch, and based on suggestions from other internet crafters, I added some cinnamon to the dough just to make it smell a bit nicer. In the end though, it was pointless because I ended up spraying them with Mod Podge varnish to preserve them. I sprayed them outside to avoid stinking up the house and when it dried the varnish had no smell at all.


We enjoyed our salt dough experiment and are very happy with the results. We ended up with about 3 dozen ornaments. Some we will keep and the rest will be given to friends and family as little gifts.

Spectacular, I can't wait to try them!
ReplyDeleteKrista
Very nice work! The personalized ones will make great Christmas tags for gifts too! Have a very Merry Christmas!
ReplyDelete